


phpMyAdmin is an open source tool used for the administration of MySQL. In addition to offering the capability to perform administration tasks such as creating, editing, or deleting databases, and managing users and permissions, phpMyAdmin provides a graphical user interface to do all of these tasks and more.
- These instructions are intended specifically for installing phpMyAdmin on Ubuntu 12.04 LTS.
- I’ll be working from a Liquid Web Core Managed Ubuntu 12.04 LTS server, and I’ll be logged in as root.
- A LAMP, Linux, Apache, MySQL and PHP, must be installed on your server. If you’re working from a Liquid Web Core Managed Ubuntu 12.04 LTS server as I am, then the LAMP stack is already installed!
First, you’ll follow a simple best practice: ensuring the list of available packages is up to date before installing anything new.
apt-get -y update
Then it’s a matter of just running one command for installation via apt-get:
apt-get -y install phpmyadmin
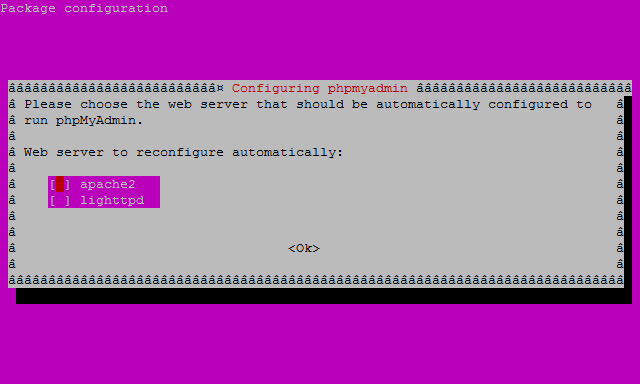
As the installation runs you’ll be asked a few simple questions regarding the basic configuration of phpMyAdmin.
At the first screen, select
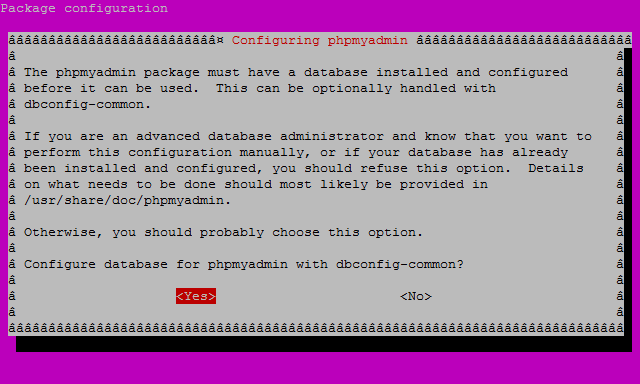
At the second screen, which asks “configure the database for phpmyadmin with dbconfig-common?”, select
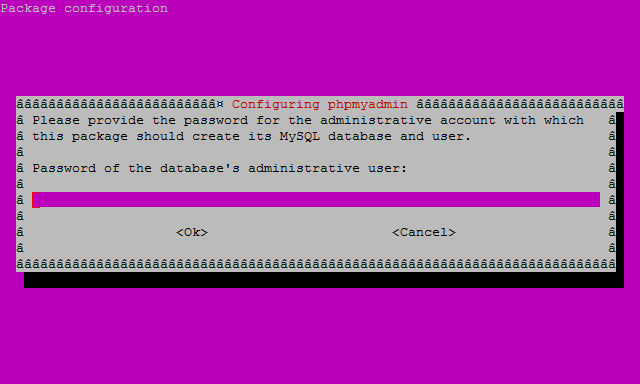
At the third screen enter your MySQL password, then hit
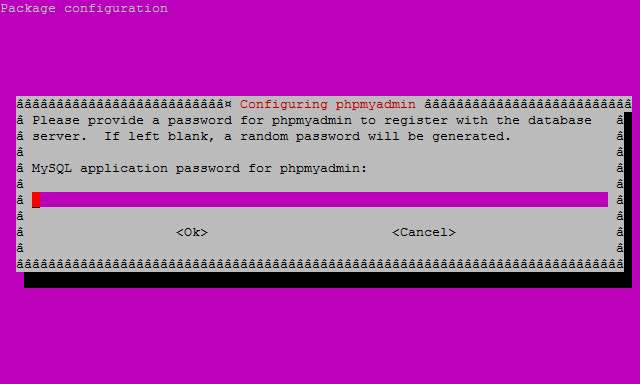
And finally at the fourth screen set the password you’ll use to log into phpmyadmin, hit
For a refresher on editing files with vim see: New User Tutorial: Overview of the Vim Text Editor
vim /etc/apache2/apache2.conf
Add the following to the bottom of the file:
# phpMyAdmin Configuration

Include /etc/phpmyadmin/apache.conf
Then exit and save the file with the command
And, restart Apache 2 with the following command:
service apache2 restart
Verify that phpMyAdmin is working by visiting the_IP_of_your_server/phpmyadmin. For example: http://127.0.0.1/phpmyadmin
Want to Try This Tutorial?
Launch a Free* Storm Server
*For new customers only
Thank you. Your request has been submitted and we’ll be sending you a $75 Storm coupon shortly!


No Comments